
As long as you aren’t squeamish about permanent markers, this is a fun and easy windsock for kids to make!
Plastic Bag Windsock Craft

Supplies:
- Plastic Bag (quart-sized)
- Permanent markers (blue and red)
- Star stickers
- Hole punch
- Yarn or string
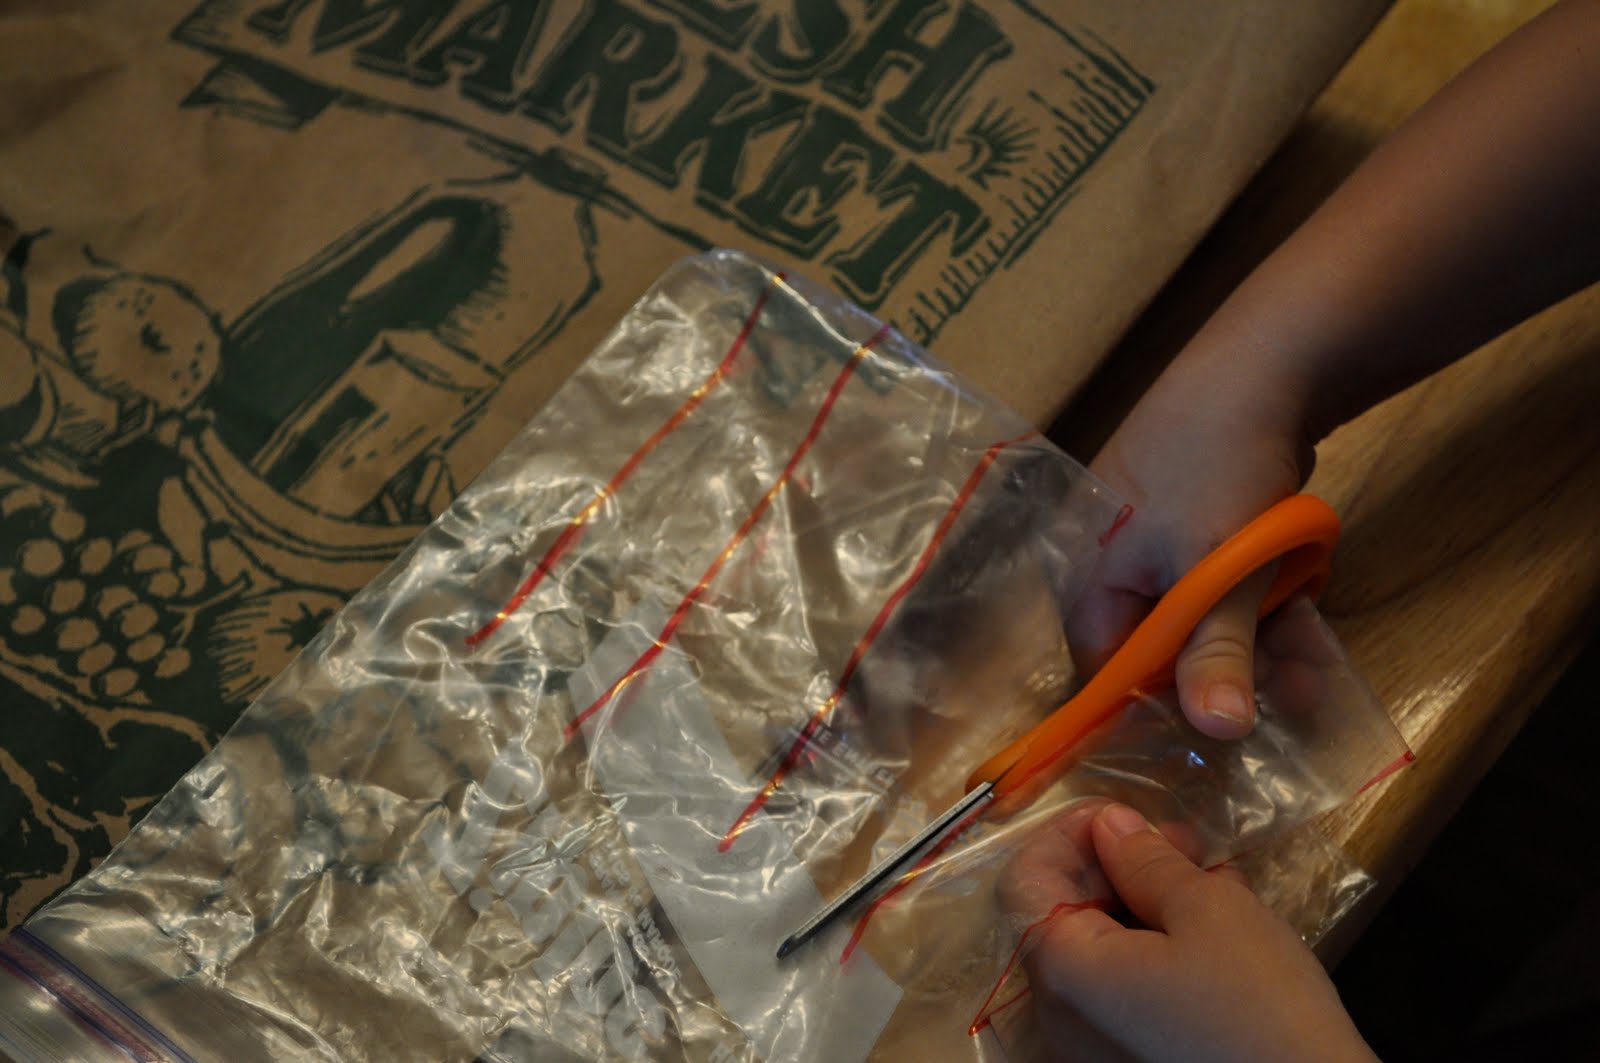
1) Draw several lines (about 2/3 up from the bottom) on the plastic bag with a red marker to give your child a guide for cutting. These will be the flag “stripes”. Color the area from the top to the start of the stripes blue.
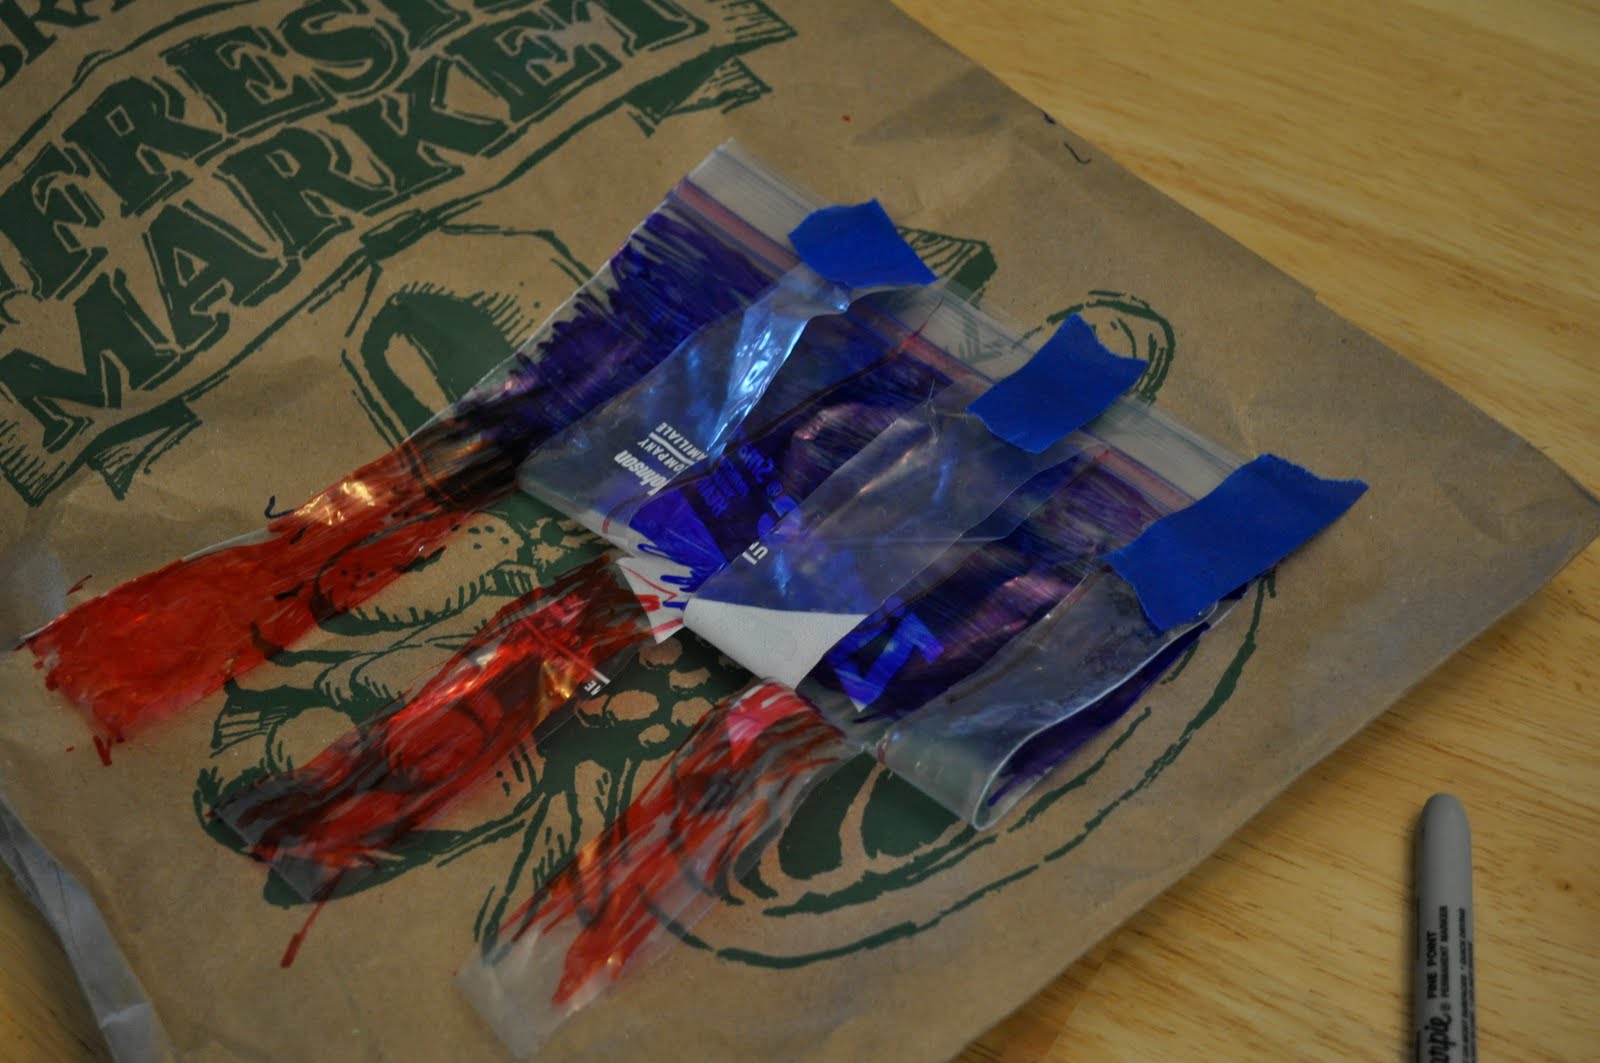
2) Examine a flag, and then talk about a red and white pattern with your child. If it is easier for your child, tape up every other stripe. Color the untaped stripes red. Cut the bottom edge of each stripe (to open it up so they can flutter in the wind).

3) Put star stickers on the blue part of the “flag”.
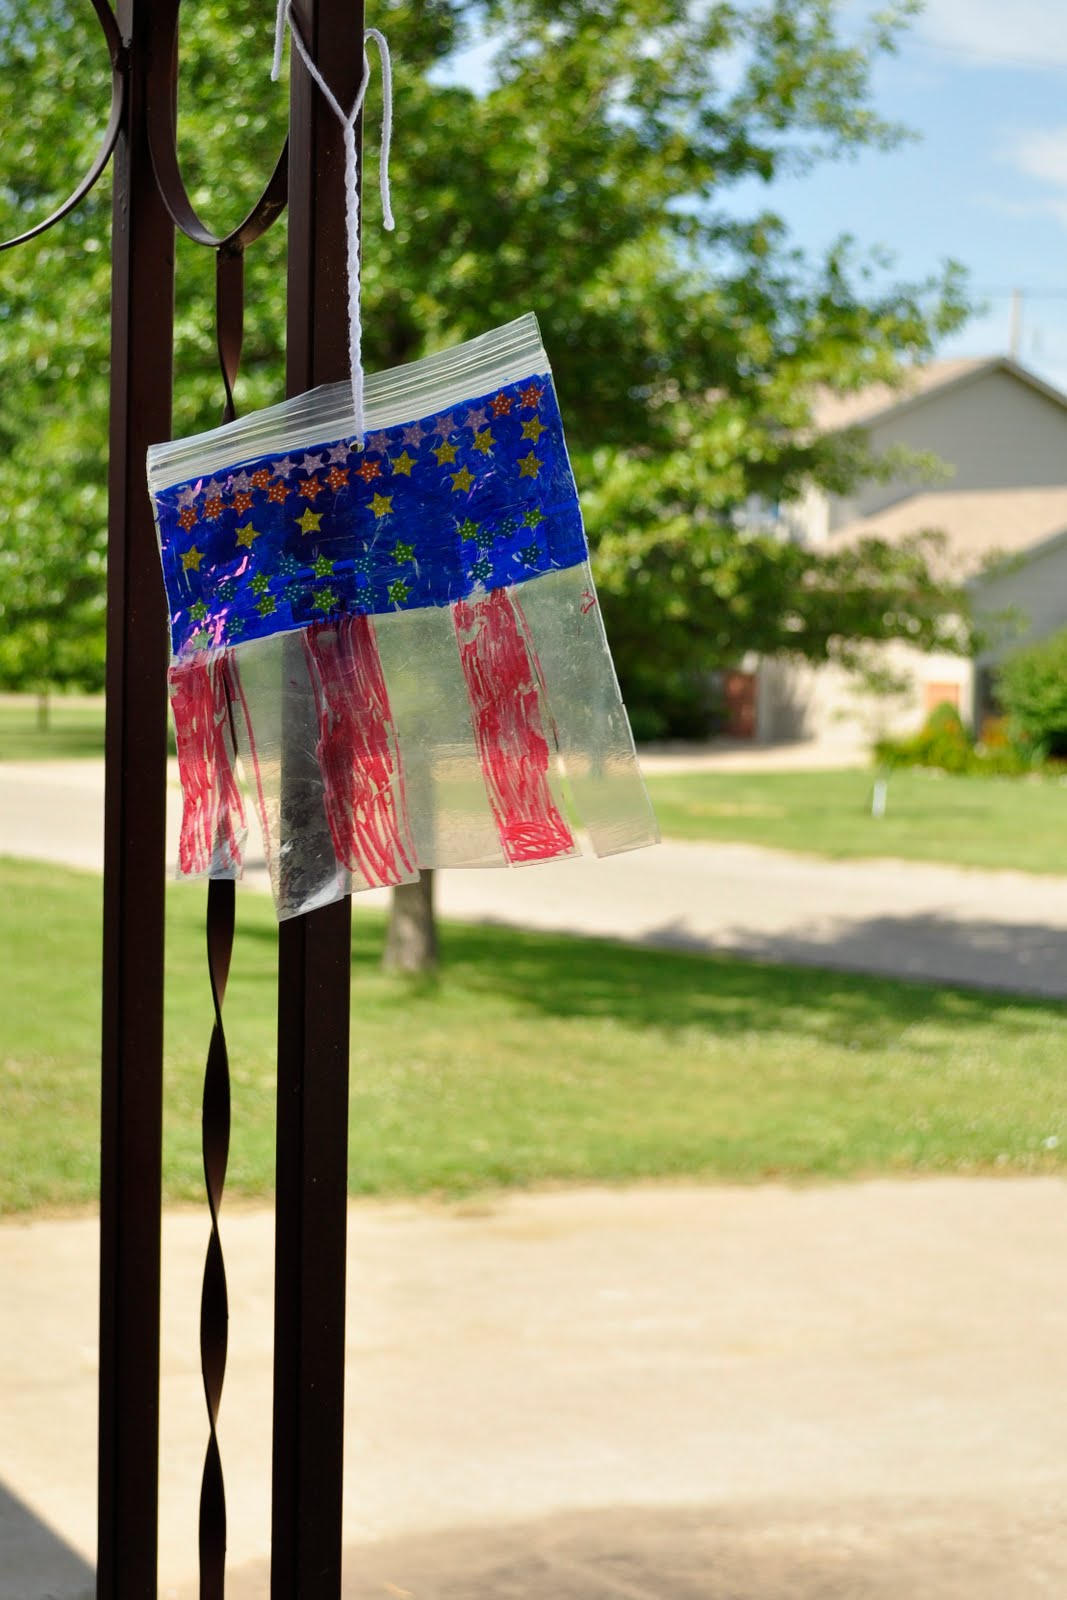
4) Hole-punch an opening in the top center. Attach to a pole or post outside with yarn or string.
What a cute idea! I love how simple it is. Great 4th of July activity. Thanks for linking up in the Big Summer Fun link-up!
Very cute, I never have ideas 4th of July crafts but I think we'll try this one =)
Thanks!!
This is really neat!
Looks fun… but I admit to being a little squeamish about permanent markers! 😉 I'll have to get over that and just let loose.
Simple, fun and green! Excellent.
Oh wow very cool and creative project, I've never seen one like this! I really like it and how it doesn't involve a lot of supplies, mainly ones most of us have on hand. Great job and thanks for sharing!